Because I teach Pre-K at a charter school, I have the unique challenge of teaching Kindergarten level material to a classroom full of 4- and 5-year olds. Anyone that has ever been around kiddos this age will agree that they need lots of hands-on activities to keep them engaged but they also need to be challenged on their level. In the past, I have made the mistake of doing a scope and sequence for my ELA activities where I had a letter of the week and a few sight words each week. I was never really happy with this set-up because a) I would always have a handful of kiddos that would know their letters and sounds but none of their sight words so they would be bored out of their mind because they weren't being challenged, b) there would be some kiddos that would need much longer to learn certain letters and letter sounds and I'm horrible about reviewing throughout the year, and c) there were always a few kiddos that just weren't developmentally ready for anything but letters and sounds and would fall behind very quickly when we would start introducing our sight words. My solution? Leveled ELA!!

Like I said, I'm very excited (maybe a bit too excited but we'll just call that an occupational hazard of being a teacher). The lower grades in my school (K-2) just agreed to changed over to the Fry sight word list. We were using one that was put together by some teachers in our school and it worked great but it was so difficult to find resources online. I took the Fry First 100 list and split it into 10 lists of 10 words and there I had my first 10 levels.
However, this posed a problem. I am not a fan of teaching a sight word to a kiddo if they don't know or aren't working on the letters in that word. So, if the word of the week is "at", it just doesn't make sense to me to teach the word if the kiddos don't already know A and T or if we aren't working on those letters while learning the word. The first 10 words of the Fry list use a combination of 11 different letters. 11 letters plus 10 sight words for the first level? I think not!
What I ended up with is a "Beginner" level (Level B) and then 10 more levels (1A-1J). This way, Level B is simply 6 letters and name writing practice. Levels 1A-1D have 10 sight words and 5 letters each. Levels 1E-1J work on CVC word blending and another 10 sight words per level.
The great thing about this is that, before going to Kindergarten at our school, we like to have the kiddos know all their letters and letter sounds plus about 33 sight words. This means, if they get through Level 1D, they've met our basic end of the year goals.
The way I set the Levels up was with lots of differentiation and easy lesson planning in mind. Because I teach Pre-K, I have to have lesson plans posted for state licensing purposes so, rather than having to put a Bingo game for one group, Go Fish for another, etc., I made sure to include each and every game in each and every level so I can simply put "Bingo" on my lesson plans, pull out my Bingo Games binder, and have 11 different versions of the game ready to go for each kiddo regardless of the level they're on.
Alright, enough rambling... on to the activities!
I have the pack kind of split into 2 sections: Level-specific activities and Materials for All Levels. As you'll see below, there are activities, like Bingo and Go Fish, that have the specific letters/words from that level included and others, like Building Mats and Rainbow Writing, that can be used with any letter or word list.
In each level, I included a portable word wall that can be put inside file folders and made easily accessible to students for journal writing, story writing, or other independent writing activities. Sight words will be added under each letter as they are introduced in each level so Level 1A will have 10 sight words, 1B will have 20, etc.
Each level also has a Word Tent. I simply laminate them and keep them in a bin next to the Word Walls. They are really handy to put in the middle of the table for a lot of the writing activities in place of the fluency cards.
Fluency cards with the focus letters/words are included. I print 3 copies on cardstock, laminate them, and cut them out. This way I have enough copies for each of my groups in case they are all on the same level and are needing fluency cards at more than one center. The cards can be used in games or even as simple flashcards for review. *Note: the cards with double letters (Tt, Oo, etc.) are meant to represent the letter's sound.
There are also instruction cards for multiple fluency card games included. These games are great when you have a few extra minutes and want to get in a bit of extra practice. Also, once you have the fluency cards printed, you basically have a handful of different games ready to go!
Like I said before, my kiddos really need hands-on games to keep them engaged and make learning meaningful. The Card Games with Props are basically card games the use objects that can be easily found in a kitchen (plates, bowls, a spatula, etc.). I like to keep the directions on a ring so they are all in one place and then I keep the cards with the props split into a bag (one for each level) to make them easy to find and put away.
Having these games pre-made is super helpful. I print 2 copies of each Bingo card so I have 6 cards total then laminate them and cut out the caller cards. I put the caller cards in a baggie and clip them to the Bingo cards then store each set of games in a sheet protector in a binder so they're nice and organized.
I also print 2 copies of the Go Fish game so there are 2 of each card. Then just play the game like you would normally play Go Fish
There are also blue, red, and yellow Guess Who cards included in the pack. Just print, cut, and put in a Guess Who game. The kiddos can ask questions like "Do you have a picture card?", "Is your letter uppercase?", or "Does your letter have all straight lines?".
The Candyland cards are a favorite in my classroom. Simply print the cards and use with a traditional Candyland game board.
An I Have, Who Has game is included in each level. Again, just print, laminate, and cut and you're ready to play!
The Feed the Gator game takes a bit more time to prep but the kiddos love feeding the letters/words to the gator.
I printed 3 copies of my Bump! game so I had enough for 6 students. I then hole-punched them and clipped them together before putting them in a binder holding all the Bump! games.
This fast-paced game is a definite favorite in my classroom. Just print the one page of letters/words and attach each word to the underside of a Dixie cup. Stack all the cups up and kiddos take turns identifying the letter/word under the cup. If they get it right, they get to stack it up and try to make the tallest structure.
In my teacher-directed center, I like to incorporate exposure to reading even when the kiddos only know letters or a few words since it helps with tracking and proper use of books. Each book has an introduction page with the letters/words included in the book, reading pages where students can practice looking for the focus words/letters and work on their fluency, an activity page, and a handwriting practice page.
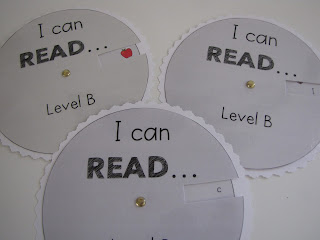
The reading wheels are great for informal assessment or just simple practice. I even like to let my kiddos use them for "quiz a friend" where they work with a partner to test each other the letters/words.
It's always good for the kiddos when they can get up and move around so I have 4 different versions of write the room activities included.
The Type and Write activity is one that the kiddos like to think of as play without realizing they're learning. They just pick a "monitor" card, practice "typing" what's on the card, then write it on their recording sheet.
Kiddos use a magnifying glass to find the tiny letters and words in this activity then record it on their recording sheet.
This simple activity is great for independent centers. Kiddos just cut the letters/words off the bottom and match them up to the picture on the top.
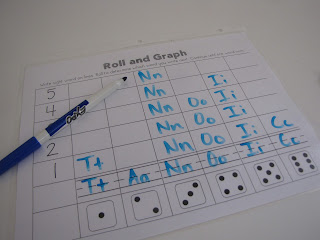
I love being able to incorporate math into my ELA centers. Students look for the letters/words, count them up, then graph them on the second page to see which ones they had the most of.
This activity can be used one of two ways: kiddos can cut the letters off the right side and glue them in order on the left or they can use the letters on the right as a sort of word bank, crossing them off as they write them on the left.
This is another activity that takes a bit longer to prep but the kiddos love it because they think it's an art activity. I print the letter card page on cardstock then trace the letters with Elmer's school glue. Let the cards dry and then the kiddos put them under their paper and rub with the side of a paperless crayon to make a rubbing.
I usually have tons of newspaper that we use to cover tables for art activities so it's super easy to use that same resource for this activity.
Have some letter stamps in your classroom? Read stamp and write is another great independent activity where kiddos stamp the word/letters and then write it with markers, crayons, etc.
Give kiddos a mirror and encourage them to use it to find what word/letters is written backwards.
Another great assessment, speed read lets you assess kiddos 4 times and show growth over that time period. I like to color code each time I assess by using a different color each time. I use the color to make a star by the items they need to practice and then record the date, time it took, and the amount they got right.
Directions for some gross motor games are also included. I printed these and put them by my large group area so we could grab the cards and pick a game whenever we had a few extra minutes.
Another great way to practice when you have just a few minutes. The cards give instructions on movements to do to practice spelling.
This game can be used with any set of fluency cards. Similar to Candyland, kiddos pick a card from the stack, read the card, and spin to move if they read the card correctly. I assembled it in a file folder so the spinner, game pieces, and board were all kept together.
To play this simple game, put a fluency card on each of the 6 spaces, then partners take turns rolling and reading the card in that space. If they read it right, they keep it. I like to take all the fluency cards and split them between the 6 spaces so there are multiple cards on each space. This helps to make game playing time a little longer.
This is one of my all-time favorites: building mats. Again, this can be used with any set of fluency cards. The kiddos pick a card, put it in the space at the top, build what's on the card, then write it on the bottom. What I love is that there is such a huge range of what they can use for building materials, we actually use this each Friday and simply change out the building materials. We use anything from playdough and Wiki Stix to snap cubes or Scrabble Cheezits.
Because I teach Pre-Kers, I usually don't include the Tic Tac Toe activity in centers because it's a little more appropriate for Kinder or 1st grade. However, I do make it accessible to the parents in my class as it is a great way to practice writing and spelling at home.
This is a simple activity where kiddos roll a die to determine their writing color, then write one of their letters or words with that color. Then they roll again and repeat. I encourage them to end up with three different colors for each letter/word so they are essentially writing each letter/word three times.
If you have ever used smelly markers with your kiddos, you know how much they love them! This super simple activity asks the kiddos to write their words using a different smelly marker for each word.
Similar to Spell and Smell, kiddos are given fun pens to write their words in a fancy or silly way.
Provide kiddos with blue and red markers or crayons. Encourage them to write the vowels with the blue and the consonants with the red.
My kiddos like to pretend they are detectives with this activity. I write their letters/words with white crayons in the blank space. They use broad tip markers to color over the white crayon revealing the mystery letter/word and then write it next to it.
This is a great activity for both readers and non-readers. The kiddos write their words/letters in the spaces provided then look through a book to see how many of their words/letters they can find. Each time they find one, they make a tally mark underneath to keep track.
Yay! More math! With this activity, the kiddos get to roll a die to determine which word they write. The first word to get all its spaces filled wins.
Each level (with the exception of Level B) has 2 assessments, a short one that assesses the current level and a cumulative one that assesses the current level and the ones before. I use the shorter one weekly so parents can see how they are doing. The longer one is for when I want to see if they are ready to pass a level and move on or if I need to keep them on that current level.
A data chart is included to easily track which level each student is on. I simply mark off the level when they complete it but you could also write in the date.
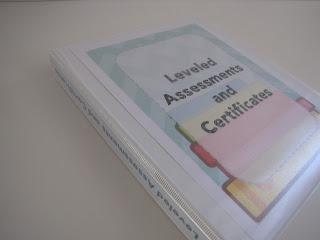
I have a binder for the assessment masters, the data chart, and the certificates the kiddos get when they complete a level. I have the certificates pre-cut and in with each level's assessment so they are ready to go. This way I can mark on the data chart when they pass and also attach a certificate to the assessment that I send home so their parents can see when they pass a level.
Whew, nothing like a novel for my first post in almost 2 years. So sorry about that! If you click on the preview file over at TeachersPayTeachers, you will find a few of the above activities for free. Enjoy!


No comments:
Post a Comment