Today I'm linking up to Forever In First for their "My teacher always says..." linky party!
The whole linky party talks about the little sayings that we use in our classroom that we say so often, they almost become a motto. My classroom is no stranger to that! In fact, we even use some of them for transitions. One of my favorites is our "Open, Shut Them" rhyme:
Open, shut them,
Open, shut them,
Give a little clap, clap, clap,
Open, shut them,
Open, shut them,
Put them in your lap, lap, lap!
Then, by the end, they should have their hands in their lap and ready to go!
Another favorite was the classic "You get what you get and you don't throw a fit". However, after talking to a lady at my church, I came up with a much better version that I plan to use this next year:
"You get what you get and you're thankful for it!"
In fact, I'm so excited to use it in my room, I even made a little sign that I intend to use.
Hope you guys can use a few of these sayings with your class! And don't forget to check out the rest of the "mottos" by clicking on Forever in First's link at the top!
Katie Poyzer
Tuesday, June 18, 2013
Goodbye Google Reader, Hello Bloglovin
<---- Be sure to check out the new button on the left!
Since Google Reader is apparently going to be gone, you can check out Blog Lovin' as one way of following all your favorite blogs. Hopefully it works well for you as I'm still trying to figure it out ;)
Plus, if you head over there and sign up soon, you should be able to import the current blogs you follow instead of having to re-follow all your favorite blogs!
Katie Poyzer
Since Google Reader is apparently going to be gone, you can check out Blog Lovin' as one way of following all your favorite blogs. Hopefully it works well for you as I'm still trying to figure it out ;)
Plus, if you head over there and sign up soon, you should be able to import the current blogs you follow instead of having to re-follow all your favorite blogs!
Katie Poyzer
Sunday, June 16, 2013
Classroom management... a necessity in Pre-K!
Today is week 2 of the Applicious Teacher's summer linky party.
This week talks about classroom management, something that is great in every class but is a complete NECESSITY in Pre-K unless you want to completely lose your mind after the first week! I always say "If you get them started early, it makes the rest of the year go by much smoother". So here are just a few of the many classroom management tools we use with our little ones.
I found this great behavior clip chart over at A Cupcake for Teacher's page and I am very excited to give it a try. The kiddos will all start on green and move up and down depending on their choices throughout the day. If they make it all the way up to Super Student they get a little jewel on their clip and, once they have 3 jewels, their clip gets retired to the Hall of Fame and they get a new one! Plus, because there's a lot of parent communication involved in Pre-K, I have a communication log that I use that goes with the colors on the chart. This way, their parents can see how they did for the day without me having 20 parents wanting my attention at the end of the day. And as if that weren't enough, I also made a little certificate that will go hope each time one of the kiddos makes it to the top of the chart! Lots and LOTS of positive reinforcement for individual behavior.
Now, once they do something that I feel like the whole class needs a reward for, we will use the Scrabble tile words to the left of the color chart. I got the idea from An Educator's Life. They say things like "Ice Cream Party" and "Pajama Day". Everytime they do something great, the star student of the week will draw a letter from the letter bag and choose where they want it to go. If they pick an A, they could put it on Ice Cream Party or Pajama Party depending on which reward they want to work towards first!
Then, because a lot of my little ones start the year not being able to read, I made the helper chart below. In addition to having the helper title, there is also a picture that they are clipped to so they can see what their job is without having to read it. For example, I put a picture of a train engine for Line Leader and a light bulb for Lights Helper. Each picture has stars on the bottom so they know how many helpers there are for each job. Plus there are enough spaces for each child in the class so no one is left out!
This next idea was one that we didn't implement until towards the end of the year but I'm wishing we would have done it MUCH sooner! What Happens In First Grade shared the Mystery Walker idea and it works like a charm, even for my little ones! You basically put all their names on little tokens or chips and, before leaving the classroom say something like "Ok, it's time to pick our mystery walker." Then, all dramatic-like, pull a name from the box, peek at it, and say, "Ok, remember, I'm going to be watching this person very carefully to see how they walk in the hall!" Because they all think it's them, they all walk perfectly down the hall! I also like to add in a little extra incentive sometimes when it seems like they're losing interest like maybe offering an extra letter to the Scrabble words. Of course, if the Mystery Walker isn't the greatest walker, I usually don't say who the walker was. Instead I say something like "Well, our Mystery Walker wasn't really following our hallway rules today. Hopefully we'll have a better line/quieter friends next time".
Now, out of all the items I have purchased over the past few years, my absolute best investment has got to be my teacher bell! We use it all day long. When it's time to come in off the playground, my bell ringer helper gets to ring the bell to have everyone line up. When I need everyone's attention, I ring it and the kiddos know to stop what their doing and wait for instructions. When we switch our small group centers, they know they can't switch until I ring the bell. You might think "Wait, small group centers in Pre-K?" Why yes, we do have small group centers. And yes, they do rotate just like the big kids. It just takes (a lot) of practice for them to get used to it. We have 4 different groups and each group has a group sign (thanks to the rainbow classroom pack from Hands On Teacher in First!) Once I'm finished with my group, I rotate their group signs as a signal for them to clean up and be ready to switch. Then, when it looks like they are all ready, I ring my trusty bell and they're set to go!
One thing I didn't have last year that I plan to make for the upcoming year (no, it's not made yet... it is summer break after all, lol) is a talking stick. I plan to use it during large group time, especially when we do sharing activities where the kiddos need to practice taking turns with talking and not interrupting. It's definitely not a new idea and I didn't really get it from one specific place. I just know that I'm going to give it a shot and see how well it works!
Hope to see you all next week for The Applicious Teacher's 3rd week: Whole Group Instruction
Katie Poyzer
![]() |
| Make sure to check out all the great classroom management tips! |
This week talks about classroom management, something that is great in every class but is a complete NECESSITY in Pre-K unless you want to completely lose your mind after the first week! I always say "If you get them started early, it makes the rest of the year go by much smoother". So here are just a few of the many classroom management tools we use with our little ones.
I found this great behavior clip chart over at A Cupcake for Teacher's page and I am very excited to give it a try. The kiddos will all start on green and move up and down depending on their choices throughout the day. If they make it all the way up to Super Student they get a little jewel on their clip and, once they have 3 jewels, their clip gets retired to the Hall of Fame and they get a new one! Plus, because there's a lot of parent communication involved in Pre-K, I have a communication log that I use that goes with the colors on the chart. This way, their parents can see how they did for the day without me having 20 parents wanting my attention at the end of the day. And as if that weren't enough, I also made a little certificate that will go hope each time one of the kiddos makes it to the top of the chart! Lots and LOTS of positive reinforcement for individual behavior.
Now, once they do something that I feel like the whole class needs a reward for, we will use the Scrabble tile words to the left of the color chart. I got the idea from An Educator's Life. They say things like "Ice Cream Party" and "Pajama Day". Everytime they do something great, the star student of the week will draw a letter from the letter bag and choose where they want it to go. If they pick an A, they could put it on Ice Cream Party or Pajama Party depending on which reward they want to work towards first!
Then, because a lot of my little ones start the year not being able to read, I made the helper chart below. In addition to having the helper title, there is also a picture that they are clipped to so they can see what their job is without having to read it. For example, I put a picture of a train engine for Line Leader and a light bulb for Lights Helper. Each picture has stars on the bottom so they know how many helpers there are for each job. Plus there are enough spaces for each child in the class so no one is left out!
This next idea was one that we didn't implement until towards the end of the year but I'm wishing we would have done it MUCH sooner! What Happens In First Grade shared the Mystery Walker idea and it works like a charm, even for my little ones! You basically put all their names on little tokens or chips and, before leaving the classroom say something like "Ok, it's time to pick our mystery walker." Then, all dramatic-like, pull a name from the box, peek at it, and say, "Ok, remember, I'm going to be watching this person very carefully to see how they walk in the hall!" Because they all think it's them, they all walk perfectly down the hall! I also like to add in a little extra incentive sometimes when it seems like they're losing interest like maybe offering an extra letter to the Scrabble words. Of course, if the Mystery Walker isn't the greatest walker, I usually don't say who the walker was. Instead I say something like "Well, our Mystery Walker wasn't really following our hallway rules today. Hopefully we'll have a better line/quieter friends next time".
Now, out of all the items I have purchased over the past few years, my absolute best investment has got to be my teacher bell! We use it all day long. When it's time to come in off the playground, my bell ringer helper gets to ring the bell to have everyone line up. When I need everyone's attention, I ring it and the kiddos know to stop what their doing and wait for instructions. When we switch our small group centers, they know they can't switch until I ring the bell. You might think "Wait, small group centers in Pre-K?" Why yes, we do have small group centers. And yes, they do rotate just like the big kids. It just takes (a lot) of practice for them to get used to it. We have 4 different groups and each group has a group sign (thanks to the rainbow classroom pack from Hands On Teacher in First!) Once I'm finished with my group, I rotate their group signs as a signal for them to clean up and be ready to switch. Then, when it looks like they are all ready, I ring my trusty bell and they're set to go!
One thing I didn't have last year that I plan to make for the upcoming year (no, it's not made yet... it is summer break after all, lol) is a talking stick. I plan to use it during large group time, especially when we do sharing activities where the kiddos need to practice taking turns with talking and not interrupting. It's definitely not a new idea and I didn't really get it from one specific place. I just know that I'm going to give it a shot and see how well it works!
Hope to see you all next week for The Applicious Teacher's 3rd week: Whole Group Instruction
Katie Poyzer
Just in Case linky party
I love linky parties and am excited to share ideas with the "Just in Case" linky party over at First Grade Blue Skies. It's a party all about cases... from cell phone to iPad and Kindle to laptop. Any case you can think of!
Personally, I don't really have cases for all my little goodies (I know, shame on me) but I do have a bag I made for my laptop that kind of serves as a case since it is nice and thick and super sturdy. Plus, I made it myself! (That would be where the "Random" in Random Craftiness comes in!)
It's basically just felt and a LOT of hot glue (and a pinch of sewing for the base layer). I basically just measured all the way around my laptop and added a couple inches for the seam allowance and to make it easier to slip the laptop in. It ended up making it about 16" across. Then I decided how tall I wanted the bag. Cut out the pieces and sew up the sides to make a very basic bag. From that point it was just a matter of adding in the cosmetic portion of it ("scales", pocket, straps).
I was thinking about doing ribbon for the straps so I wouldn't have to sew but decided that, for better strength, I would make a few felt straps which was pretty much just cutting two long rectangles, folding them in half, sewing up the side, and turning them right side out.
Now this is where the glue comes in. I started with the pocket which is one long rectangle that stretches from the middle of the back to the middle of the front and glued a straight line where the pocket meets the bottom of the bag. I then glued the straps onto the bottom of the bag on either side of the pocket. Then I just started layering on the scales. Once the scales were on, I could finish securing the pockets and straps. And done!
I'm super excited to make a few more along the same lines. Maybe something in black and white chevron? Or even rainbow stripes? What do you think?
Katie Poyzer
Personally, I don't really have cases for all my little goodies (I know, shame on me) but I do have a bag I made for my laptop that kind of serves as a case since it is nice and thick and super sturdy. Plus, I made it myself! (That would be where the "Random" in Random Craftiness comes in!)
It's basically just felt and a LOT of hot glue (and a pinch of sewing for the base layer). I basically just measured all the way around my laptop and added a couple inches for the seam allowance and to make it easier to slip the laptop in. It ended up making it about 16" across. Then I decided how tall I wanted the bag. Cut out the pieces and sew up the sides to make a very basic bag. From that point it was just a matter of adding in the cosmetic portion of it ("scales", pocket, straps).
I was thinking about doing ribbon for the straps so I wouldn't have to sew but decided that, for better strength, I would make a few felt straps which was pretty much just cutting two long rectangles, folding them in half, sewing up the side, and turning them right side out.
Now this is where the glue comes in. I started with the pocket which is one long rectangle that stretches from the middle of the back to the middle of the front and glued a straight line where the pocket meets the bottom of the bag. I then glued the straps onto the bottom of the bag on either side of the pocket. Then I just started layering on the scales. Once the scales were on, I could finish securing the pockets and straps. And done!
I'm super excited to make a few more along the same lines. Maybe something in black and white chevron? Or even rainbow stripes? What do you think?
Katie Poyzer
Saturday, June 15, 2013
Phonics Word Building Book
I saw this great idea on Pinterest and thought I would give it my own little spin. ![]() |
| Phonics Flip Book |
I went to Staples to find a bound notecard book like the one above but was pleasantly surprised to find this awesome blue one! Instead of being the size of one notecard, it's the size of three! It has a nice durable plastic cover rather than paper, has pockets in the front cover, and the 3-per-page notecard pages are perforated so you can rip them to separate instead of having to cut each page!
![]() |
| Index Card Notebook |
I just printed the cover onto a full sheet label (2 per page). Click here for your own copy!
Because there are three cards per page, I was able to put all the consonants on the left and right sides and all the vowels in the center to make CVC words.
I also put beginning and ending blends on the left and right sides (all in alphabetical order of course so it's easier to find) and vowel blends like "oo", "ea", etc. in the center. I can pretty much make any 5 letter word!
Hope you enjoy it!
Katie Poyzer
Friday, June 14, 2013
A work in progress and my first linky party!
I'm very excited to be participating in the linky party over at The Applicious Teacher! There is a new topic each week throughout the summer and I can't wait to share what I've been working on during my break. Be sure to check out this week's topic by clicking the "Apple a Day" picture below:
I am also linking up with Kinder Alphabet for their Classroom Decor linky party. Make sure to check out lots of other wonderful ideas by cliking on their link:
So this sad, boring picture was my circle time area on the last day of school. I promise it wasn't this bad throughout the year but we did take down a LOT of the decorations during the last day and half so I could get a bit of a head start on my summer. Actually, I had a massive tree covering my wall but replaced it with the rainbow to start up my rainbow theme for this upcoming year.
First of all, I had to take a step back and figure out what my biggest problem(s) were with the way I had my wall set up. Not only was I missing a display for my "Months of the Year" but I also didn't have a very clear way of showing "Yesterday, Today, Tomorrow" with my days of the week. These were only a few of my problems!
After a (relatively) cheap trip to Walmart and a little laminating (ok, a whole lot of laminating), I was ready to get started! And yes, that is a curtain rod in the picture (we'll get to that :) ).
Finally, after a grueling 6 hours at work this afternoon, here's my new calendar area! I am absolutely in LOVE with my days, months, and calendar numbers. They came from a rainbow themed classroom set over at The Hands On Teacher In First. Her set also includes some great storage bin labels, reading center labels, birthday cards, bookmarks, and pretty much anything else you can think of that your classroom might need! Plus I love how my number line turned out! There's a page for each number (0-30) and each little poster has the numeral, number word, ten frames, base ten blocks, and tally marks to represent each number. You can find this great set in my store (shameless promoting :) ).
I love how the "days", "months", and "today's date" turned out. All it took was a little construction paper, some letters cut out on my Cricut, a WHOLE LOT of laminating, and some Velcro. Now I have all my months and days displayed. All I have to do is change the little yesterday, today, tomorrow circles each day and take the new month off to switch with the old at the beginning of the month. Nice and low maintenance! My favorite part is the sentence strip on the "today's date". As you can see in the picture above, I invested in some new wet-erase markers. I can have my kiddos help me write the date each day and erase it with a baby wipe at the end of the day! Yay for reusing!!
Now, I know it's a tiny picture above but there's a tiny little blue pocket chart (I promise, it's in there) that I was using for our behavior management system last year. We did the popular color system where each kiddo started on blue each day. If they made a bad choice, they went to yellow, then orange, and finally red where we had to contact a parent. If they made great choices like helping without being asked (and yes, I've had some that helped and then asked to go to green where they were quickly reminded that only behavior that was done without the expectation of a reward would earn a green day), they moved to green. It worked wonderfully but it seemed like, once the kiddos made it up to green, they stopped trying to help out because that was all the farther they could go. Insert clip chart below. I found this beyond wonderful chart at A Cupcake for the Teacher. It comes with the chart (of course), the hall of fame poster (when one of the kiddos makes it to super student, they get a little jewel on their clothespin and, when they've earned 3 jewels, their clip goes to the hall of fame and they get a new one!), and bookmark-sized reproductions of the chart to send home with parents as a reminder of the order in the chart. I send home a daily communication paper for each of my kiddos so the parents know their color of the day plus I made certificates to go with the chart so, whenever someone gets to the top, they get a certificate sent home! Lots and LOTS of positive reinforcement! (I'll talk lots more about the communication paper and certificate in next week's linky party post :) ).
Also, although they're small, you'll notice some rainbow colored "blobs" that say things like ice cream party and pajama day in a Scrabble font. This is our large group reward system for next year. I got the idea from An Educator's Life. When they class as a whole does something to earn a reward, the star student of the week chooses a letter from the letter bag (without peeking of course!) and chooses one of the spaces to put it on. So, if they were to pull the letter A from the bag, they could choose to put it on one of the As in Pajama, or in Ice Cream Party or anywhere else there's an open A. This way they get to choose which reward they want to work towards. Once all the letters for one of the rewards have been collected, they get that reward. Easy peasy!
This last part is the part that I'm most proud of. It's also where the curtain rod comes in. One be dilemma I faced was how to cut down on the amount of easel paper I was going through while still keeping the amount of large items I had in my room to a minimum. My solution? I made blank anchor charts, laminated them, and punched holes in the top to display. I found a great (and cheap!) curtain rod and nice, huge rings (shower curtain department) at Walmart. The best part is that it's mounted to the wall so I don't have to worry about it taking up corner space or having little ones tipping/pushing it over, it's super easy to flip the charts to the one I want to use, and I have a hard surface to write on (the wall)! Plus, I thought of it all on my own... no Pinterest help (although I'm sure it probably is on Pinterest somewhere). Also, since they're laminated, I can use the same markers I use for my "Today's Date" to write on the posters and I'm still able to erase and reuse them!
Even though I went in to work for the better part of the day and feel like I got so much done, I still have not made a dent in everything I need to do. I got these adorable stools from Ikea for our rainbow table area and I need to make cushions for each one (one done, 7 to go!).
Plus I have this 6 foot long... thing... to finish and hang in my wall that I intend to use to display all my classroom info like my schedule, newsletter, daily lesson plans, and all those other wonderful things required by state licensing.
Thank goodness I still have a few weeks left of summer! Hope you're enjoying yours and be sure to check out the rest of the classroom decor ideas over at The Applicious Teacher!
Katie Poyzer
Monday, June 3, 2013
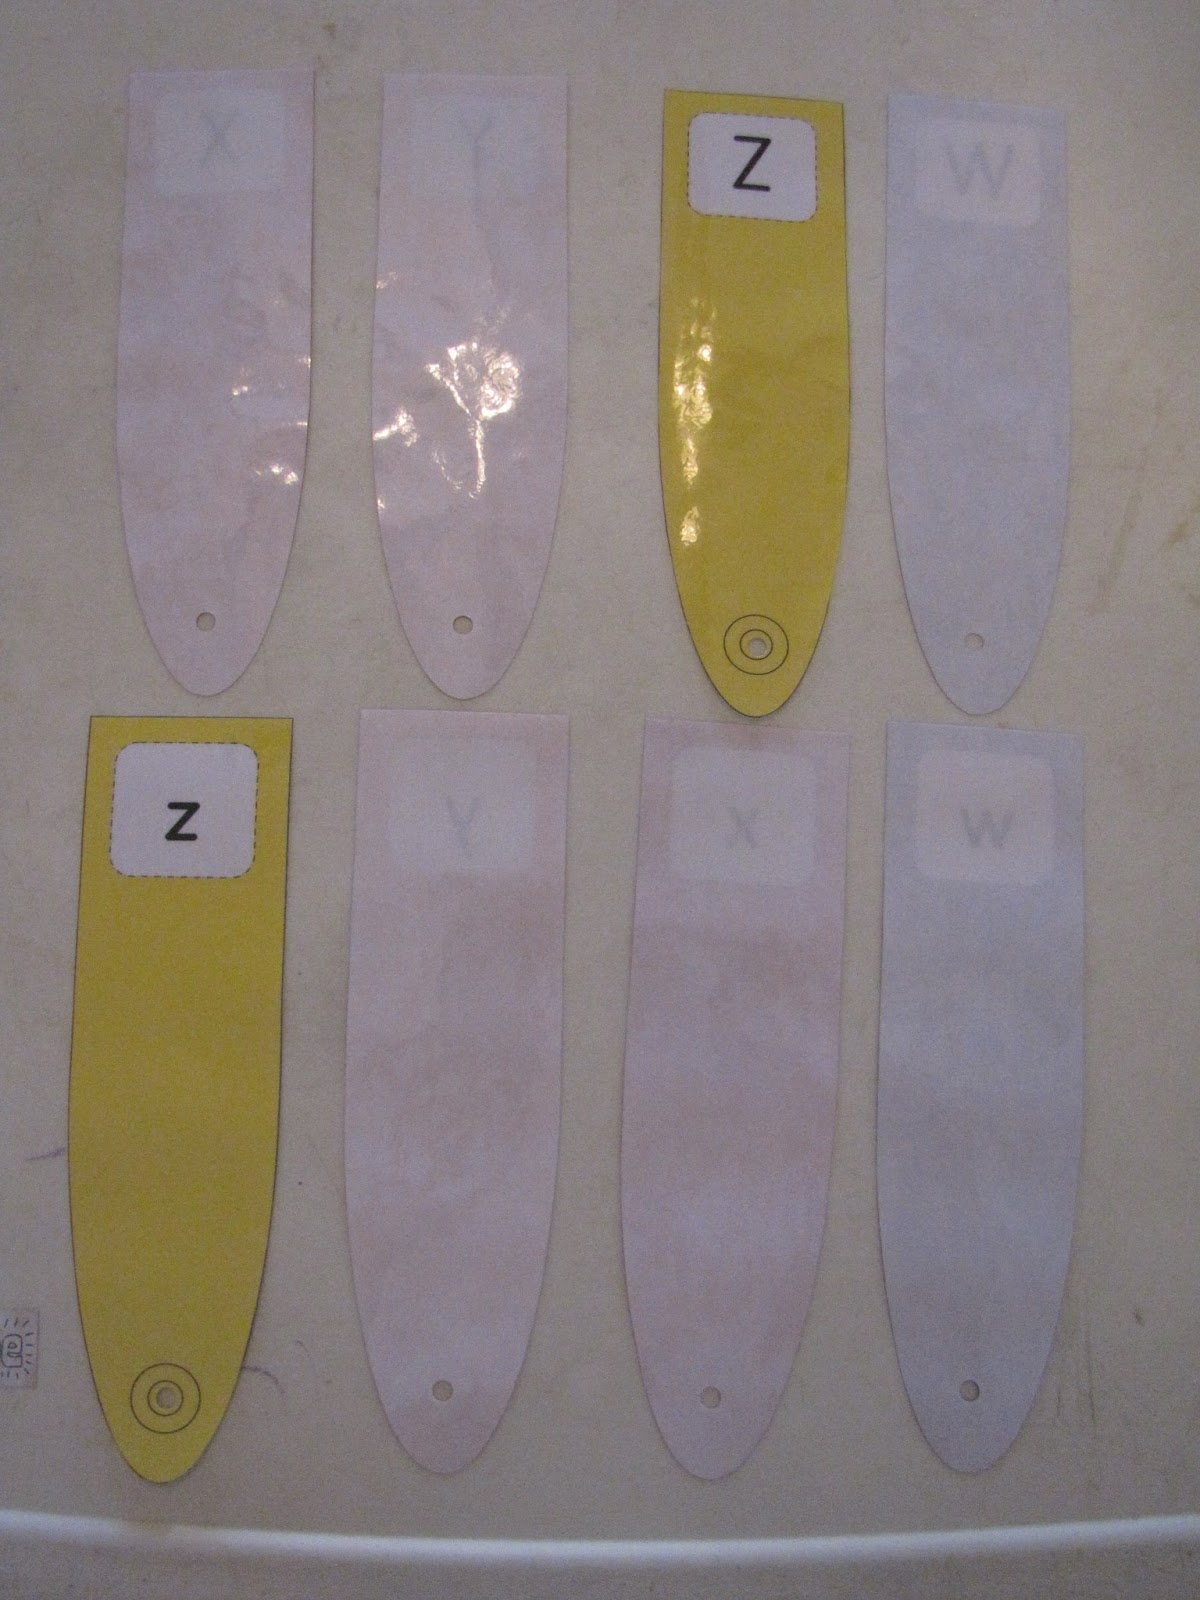
Our school has officially been on summer break for a week now. First of all... YAY! Second of all... Shoot! I still have 2 little girls at home with me and I would really like them to retain a little bit of what they've been doing at school the past year without having to do full-on homeschooling with them. Plus, for some strange reason, I felt the need to tutor for the first 4 weeks of summer. This leaves me with the problem of finding something I can make that will keep them all working without boring them but also without making 20 different things and without having them sit in front of electronics for 6 hours a day while I try to get some work done. My solution? Flashcards! Kind of...
I was inspired by these beginning sounds blends I saw on Pinterest:
At first I thought the girls would run and hide when they saw them because they looked so much like flashcards but I think they rainbows and bright colors helped. So I started out with my 3-year old since she was much more eager than my 7-year old.
We practiced number recognition,
And counting with one-to-one correspondence.
Finally, we decided to combine the uppercase and lowercase sets to do some uppercase/lowercase matching
They must have had fun because Tahlia actually tried to take them with her when she went to take her nap!!
If this looks like something you could use, you can find the three sets and a bundled set in my store!
Hope you enjoy!
Katie Poyzer
I was inspired by these beginning sounds blends I saw on Pinterest:
Unfortunately, the picture was uploaded by the user so I couldn't get an actual source to download them. So what's a girl to do? I experimented with clipart and shapes in Word and this is what I came up with.
At first I thought the girls would run and hide when they saw them because they looked so much like flashcards but I think they rainbows and bright colors helped. So I started out with my 3-year old since she was much more eager than my 7-year old.
We practiced number recognition,
And counting with one-to-one correspondence.
Then, like I thought, my 7-year old was seeing all the attention (and fun!) and decided she wanted in on it too!
So we worked on addition and subtraction,
number comparisons,
and numerical order.
Then we switched gears to work on literacy. We did number recognition with Tahlia first.
Noella was next with beginning sounds (she thought this was pretty easy and I should hope it was!)
spelling,
and alphabetical order.
Finally, we decided to combine the uppercase and lowercase sets to do some uppercase/lowercase matching
Memory
and Go Fish!
They must have had fun because Tahlia actually tried to take them with her when she went to take her nap!!
If this looks like something you could use, you can find the three sets and a bundled set in my store!
| Math Fan Numbers 0-30 |
| Uppercase Phonics Fan |
| Lowercase Phonics Fan |
| Math and Phonics Fan Bundle |
Katie Poyzer
Subscribe to:
Posts (Atom)